How do I find my competitor’s patents?
What can the Patent Monitor do?
90% faster & 400% more accurate
Patent Monitor is a truly intelligent patent analysis software that helps you to protect your property rights, find competitor´s patents or give you freedom to operate. Compared to conventional, rule-based approaches, Patent Monitor performs up to 400% more accurate. At the same time, the application reduces the manual effort for identifying relevant documents by up to 90%.
Find competitor’s patents & protect your property rights
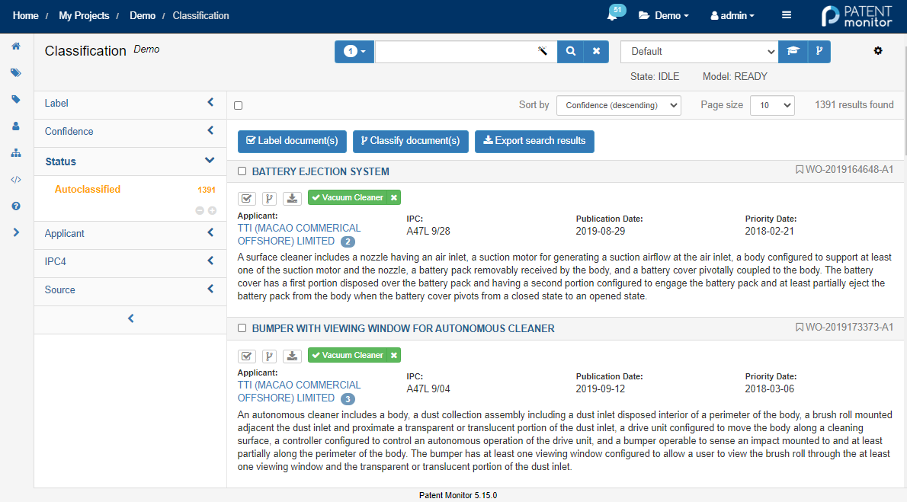
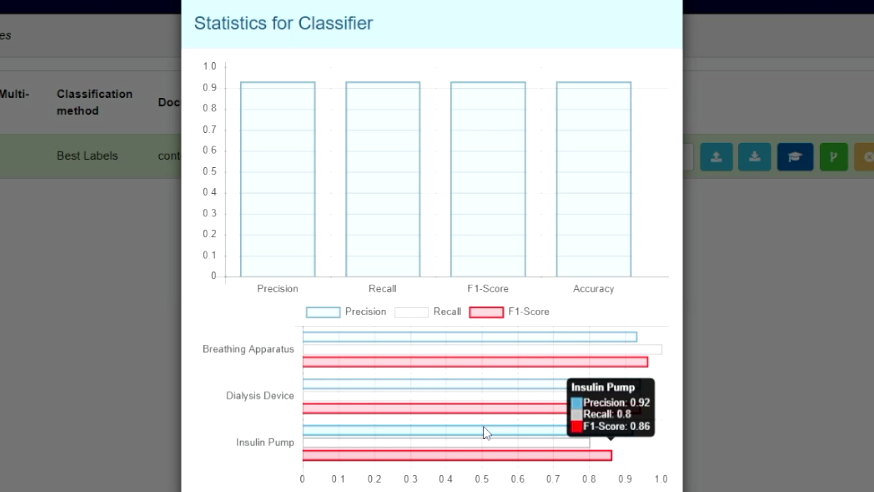
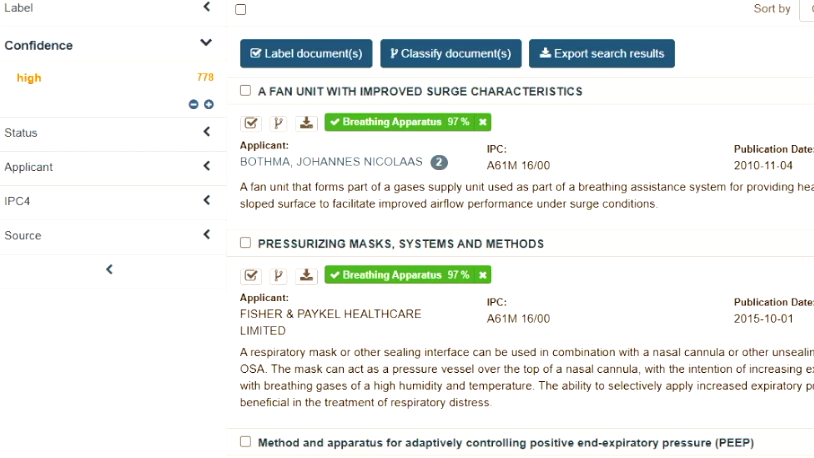
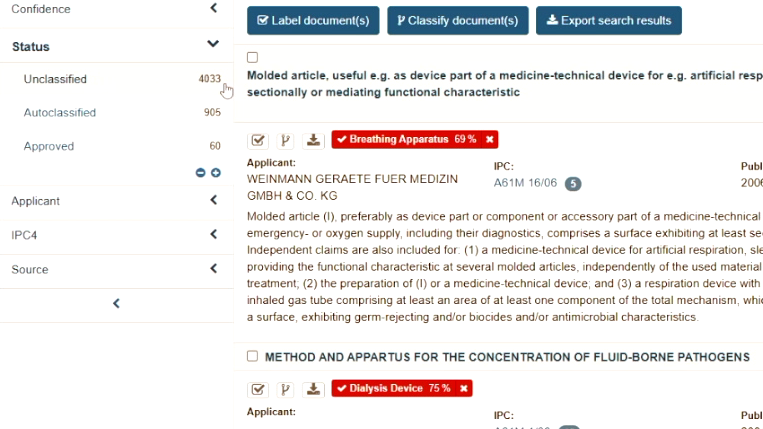
It is the worlds first application that allows you to automatically classify large quantities of patents into your own user-specific categories and to assess their relevance for you and your company. Patent Monitor is based on artificial intelligence, which means that the software learns and acquires the know-how from you as an IP professional. You have the options of importing your results as an Excel spreadsheet, displaying the data on Tableau in clear graphs, or viewing individual patents in the Patent Monitor.
How to do a patent search with Patent Monitor

Patent Monitoring with AI in less than 15 min
Check out this video for a quick insight in how patent monitoring with AI can not only save you a lot of time but at the same time provide you with new valuable insights and that in less than 15 minutes.
The video is taken from our presentation at Tony Trippe’s webinar series on ML4patents.com (Episode 6) powered by Patinformatics LLC. The full video can be accessed on https://www.ml4patents.com/webinars.
For more information on the Patent Monitor and how you can benefit from it contact us!
Use Cases
At Patent Landscaping you can find your competitor´s patents on specific topics and areas. For an efficient potential and risk assessment it is important for companies, investors and the research and product areas essential.
However, to create the patent landscape without the appropriate software for automation, a lot of manual work steps and considerable resources are necessary during your patent analysis.
Get a clear overview of the patent structure within a specific technical area or region. Periodically and systematically observe current developments and patent applications of competitors.
Support your freedom-to-operate (FTO) analysis and develop products without jeopardizing the intellectual property of others.
Avoid disputes over intellectual property rights with competitors following product launch. Such disputes often result in considerable costs and also unsettle your customers and potential buyers of your product.
Determine the patentability of your own innovation or attack a patent of a third party (due to lack of innovation) to open up new markets.
The prior art analysis focuses on whether your innovation is already known. The innovation does not have to be physically present or commercially available. Often it is sufficient that another person or company has already documented, presented or produced or used the same innovation.
With the Portfolio & Competitor Analysis you are able to evaluate the strengths and weaknesses of your patent portfolio compared to your competitors.
You can keep a constant eye on technological and strategic information about current and future competitors.
Today, in many companies, patents represent a considerable part of the business assets and decide on successful product portfolios and the decisive advantage over the competition.
Three quick tutorial videos on how to easily set up your first patent classification using the Patent Monitor.
Adaption & Integration
What our Customers say
The automatic identification of patent specifications relevant to us has significantly increased productivity in our department. The cooperation with Averbis is extremely pleasant – this is really about solving my problems!
Timewise, we can now turn 3-week processes into 3-hour processes, saving our customers valuable time.
Timewise, we can now turn 3-week processes into 3-hour processes, saving our customers valuable time.


